The Clip Studio Tabmate is a new handheld device that can be used with pen tablets and
tablet devices so that you can more easily create your illustrations, comics, cartoons, and animations.
By customizing the settings for each button, you can switch to your most frequently used tools with the press of a button.
With its symmetrical design, it’s easy for anyone to use, whether left- or right-handed.
- ▼ Specifications
- ▼ System Requirements
- ▼ Contents of Package
- ▼ User Guide
- ▼ Support
- Buy Now at amazon
How to Start Using CLIP STUDIO PAINT DEBUT Ver. 1
This product comes with a Clip Studio Paint Debut Ver.1 license for Windows/macOS.
Follow the instructions in the below link to install and use this software.
Download CLIP STUDIO PAINT DEBUT Ver. 1
The serial number is on the inside of the top flap of the package.
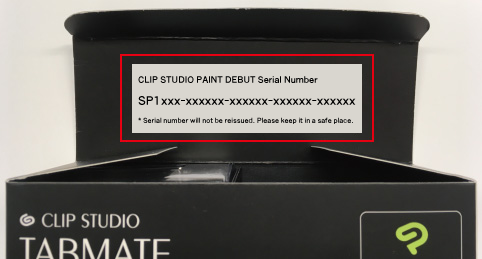
* Serial number cannot be reissued. Please keep it in a safe place.
Specifications
Version: Bluetooth® 3.0 Class 2 (wireless)
Bluetooth® range: Approx 3–10 m
Radio frequency: 2.4GHz
Battery: 1 x AA battery
Warranty period: Six months from receipt of the product
* Does not require drivers.
* If your device does not have Bluetooth® functionality, you will need a separate Bluetooth® adapter.
* Make sure the adapter is for class 2, Bluetooth® 3.0.
* The macOS has been tested to work with the Bluetooth® built into the Mac device itself.
* Your Galaxy device must have Bluetooth® capabilities.
* Ensure that you read all items on the enclosed “For Your Safety”.
System Requirements
OS: Windows 8.1 64bit , Windows 10 64bit , Windows 11 64bit
macOS 10.14 , 10.15 , 11 , 12
Android 9 or later
Software: CLIP STUDIO PAINT DEBUT / PRO / EX Ver.1.10.0 onwards
* The device is not compatible with other operating systems.
Contents of Package
- Controller x 1
- Serial number for downloading Clip Studio Paint Debut Ver. 1 for Windows/macOS x 1
- AA battery (for testing purposes) x 1
- Instructions/Warranty (paper) x 1
* The included battery is for checking the controller’s operation. Please switch this for a store-bought battery after checking that the controller operates correctly.
User Guide
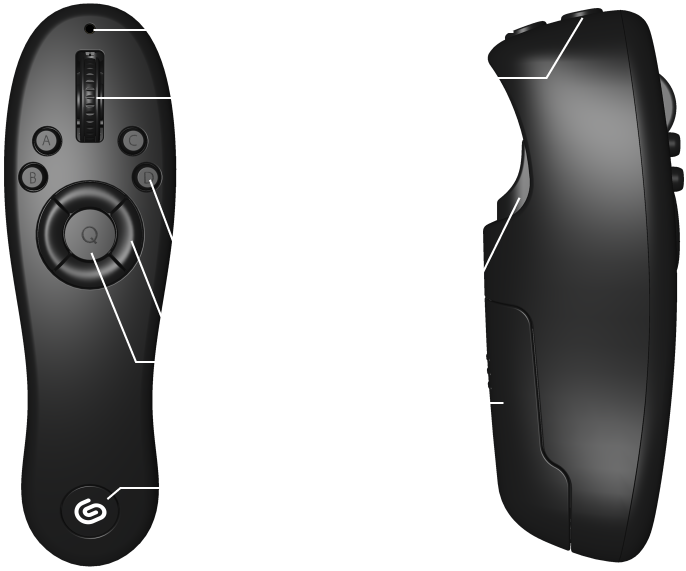
Part Names
Getting Started
* The Bluetooth® function (module) must be installed on the device being used.
* Your computer or Bluetooth® adaptor may have its own Bluetooth® functions. Please check the operating manual before use.
Windows (Windows 8.1 and newer)
- Right click the Bluetooth ® icon in the notification area and click “Add Bluetooth device”.
* The icon will sometimes be stored in the pop-up window accessible via the up-arrow. - Open the “Manage Bluetooth devices” screen and check that Bluetooth is turned on. Then long-press the [CLIP STUDIO] button on the controller for three seconds to turn the power on.
- When the power is on and the device is in pairing mode, the LED will flash red and blue alternately.
- On the “Manage Bluetooth devices” screen, select “TABMATE” and click “Pair”.
- When the device is paired, the “Manage Bluetooth devices” screen will show the “TABMATE” as “Connected”.
Now you can start using your TABMATE with CLIP STUDIO PAINT.
macOS
- From the Bluetooth® menu, select “Open Bluetooth Preferences”
* If the Bluetooth® menu is not displaying, go to the Apple menu and select “System Preferences”. From the “System Preferences” screen, select “Bluetooth”. - On the “Bluetooth” screen, check that Bluetooth is active. Then long-press the [CLIP STUDIO] button on the controller for three seconds to turn the power on.
- When the power is on and the device is in pairing mode, the LED will flash red and blue alternately.
- Select “TABMATE” from the list of devices in the Bluetooth® panel and click “Pair”.
- When the device is paired, the “TABMATE” will show as “Connected” in the list of devices.
Now you can start using your TABMATE with CLIP STUDIO PAINT.
Main Operations
- Long press the [CLIP STUDIO] button for three seconds to turn the power on or off.
- When the power is turned on, the controller will automatically enter pairing mode. If you want the controller to enter pairing mode, turn the power off and on again.
- If the controller cannot find a computer to pair with after searching, or if the controller is not used for 10 minutes, it will enter sleep mode. To wake it from sleep mode, press any button (except the [CLIP STUDIO] button.)
- If the controller is left in sleep mode for 20 minutes, the power will automatically turn off.
- The TABMATE remembers the device it last paired with. It will automatically connect with this device.
- While connected with a remembered device, it cannot connect with a different computer (it is not recognized as a device to connect with, so it cannot be detected). To connect with another computer, shut down the computer you are currently connecting with, or stop the pairing.
Changing the Settings
You can set up your Tabmate by going to the [File] menu (For macOS: [CLIP STUDIO PAINT] menu, for Galaxy / Android: [P] menu) > [CLIP STUDIO TABMATE] > [CLIP STUDIO TABMATE Settings], while the TABMATE is connected.
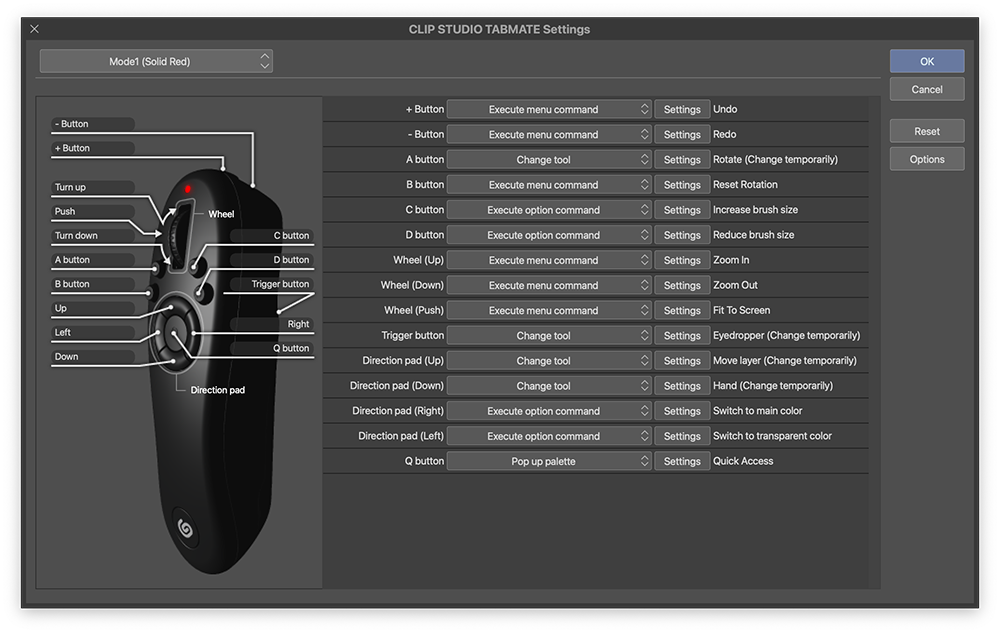
You can switch between four modes on the TABMATE.
Set up your assigned functions for each button, switching between modes using the button at the top left of the above dialog box.
If you press a button on the TABMATE, that button will be highlighted in the above dialog box.
For detailed settings for each button, please read “Actions and Special Settings for Buttons” on this page.
The default settings when you purchase a TABMATE are as follows.
Mode 1 |
Mode 2 |
Mode 3 |
Mode 4 |
|
|---|---|---|---|---|
+ Button |
Undo |
Undo |
Undo |
Undo |
- Button |
Redo |
Redo |
Redo |
Redo |
A Button |
Change tool temporarily: Rotate |
Change tool temporarily: Rotate |
DEBUT: Change tool temporarily: Auto select |
Change tool temporarily: Rotate |
B Button |
Reset rotation (of canvas) |
Reset rotation (of canvas) |
Depends on length of press Short press: Fill Long press: Deselect |
Reset rotation (of canvas) |
C Button |
Increase brush size |
Increase brush size |
Increase brush size |
Increase brush size |
D Button |
Decrease brush size |
Decrease brush size |
Decrease brush size |
Decrease brush size |
Q Button |
DEBUT: Color Set (Pop-up) |
DEBUT: Color Set (Pop-up) |
DEBUT: Color Set (Pop-up) |
DEBUT: Color Set (Pop-up) |
Direction Pad (Up) |
Change tool temporarily: Move layer |
Change tool temporarily: Move layer |
Change tool temporarily: Move layer |
Change tool temporarily: Move layer |
Direction Pad (Down) |
Change tool temporarily: Hand |
Change tool temporarily: Hand |
Clip at Layer Below |
Execute with repeated taps |
Direction Pad (Right) |
Switch to main color |
Tool Rotation |
Execute with ON/OFF |
Change tool temporarily: Fill |
Direction Pad (Left) |
Switch to transparent color |
Scale up/Scale down/Rotate (Transform) |
Execute with ON/OFF |
Scale up/Scale down/Rotate (Transform) |
Wheel (Rotate up) |
Zoom In |
Zoom In |
Zoom In |
Zoom In |
Wheel (Rotate down) |
Zoom Out |
Zoom Out |
Zoom Out |
Zoom Out |
Wheel (Push) |
Fit canvas to screen |
Fit canvas to screen |
Fit canvas to screen |
Fit canvas to screen |
Trigger Button |
Change tool temporarily: Eyedropper |
Change tool temporarily: Eraser |
Change tool temporarily: Eyedropper |
Deselect |
CLIP STUDIO Button |
Switch to Mode 2 |
Switch to Mode 3 |
Switch to Mode 4 |
Switch to Mode 1 |
CLIP STUDIO Button |
Turn power on/off |
|||
* The settings for the [CLIP STUDIO] button cannot be changed. (Long press: Turn power on/off; short press: Switch modes).
* The modes were set up with the following imagined uses: Mode 1 - Sketching; Mode 2 - Inking/drawing; Mode 3 - Coloring/painting; Mode 4 - Processing/finishing details.
Actions and Special Settings for Buttons
Use the TABMATE by pressing the button to run the assigned command or switch to the assigned tool.
You can assign multiple functions to a single button by assigning functions based on time pressed (short press/long press) or by number of taps (up to four taps).
You can also use “Tool rotation” to switch to a particular tool group you have set up, “Pop up palette” to display a palette while the button is pressed, and “Execute with ON/OFF” to assign operations to when a button is pressed or released, such as assigning on and off to “play/stop” so that an animation plays only when the button is pressed.
User Support


© CELSYS, Inc.
Celsys, Inc. / President: Narushima Kei / Corporate Number (Japan): 1011101062869
Pacific Marks Shinjuku Parkside 2F, 4-15-7 Nishi-Shinjuku, Shinjuku-ku, Tokyo 160-0023 Japan
+81-3-3372-3156 support@celsys.com